
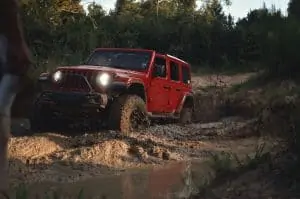
Are you an off-roading enthusiast? An off-roading junkie is aware of the fact that nighttime driving is a great adventure-based activity. To enhance the overall security while driving at night, lighting upgrades are vital.
When you put on additional lighting on the ride, it helps in maximizing nighttime visibility from various directions and different angles.
Extra lighting would help in illuminating any obstacles available on various sides of the vehicle while ensuring a highly safe off-roading experience.
This blog below will discuss where and how to mount off-road lights along with their importance.
Contents
What Are The Different Type of Lights To Use?
Whenever we think of off-road lights, there are a lot of options that come to our minds. But not all lights can be equally used for the same purpose.
Off-road lights have a certain characteristic that demarcates them from the rest. A flood and a long beam usually characterize these lights. Other than that, off-road lights are also identified by the type of usage.
Due to the advance in technology, many reputable brands provide us with off-road lights starting from Rigid Industries, Hella, Nilight, and Lightforce.
Commonly, it is seen that off-road lights are usually rated through power usage, and there are three types of lights available today.
- Halogen
- HID
- LED
While it is seen that halogens are less expensive, people who are often out at night prefer the HID or High-Intensity Discharge Lights. The latter has the brightest beam, which helps you stick to the road and see the obstacles ahead.
What Is The Suitable Place For The Installation of Off-Road Lights?
The places where you tend to install the off-road lights come with the respective set of benefits and demerits.
The selection of the right location for the vehicle would ultimately depend on the type of light you are installing and the respective purposes.
Here are some common places to consider for the installation of off-road lights:
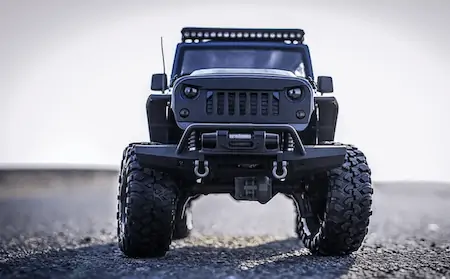
Bumper
It serves to be one of the simplest locations in your vehicle when it comes to mounting the off-road lights. Most of the aftermarket Jeep bumpers tend to feature built-in lighting mounts.
Moreover, wiring in the given location serves to be an easier process. Even when you have a stock bumper, the installation process turns out to be simpler with minimal drilling and the utilization of the right tools.
The merits of mounting the off-road lights on the bumper are more than the overall ease of installation. The lower placement to the ground makes the bumper an ideal location for mounting the fog lights.
This is because warm light would then travel across the road instantly while providing improved illumination in poor weather conditions.
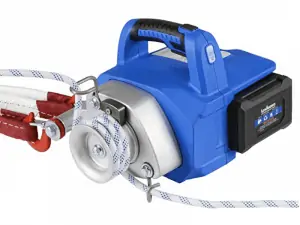
However, make sure you have enough space to place the right on your bumper. Often, after installing a truck winch, it becomes difficult to fit extra lights.
Lower Windshield Pillar
When you include the off-road lights on the lower end of the windshield pillar, it would serve as a great way to boost the overall visibility to even the sides.
The overall installation process can serve to be a breeze when you make use of the existing mounting hardware for the windshield.
When the off-road lights are mounted at the lower areas of the windshield, the same can be easily angled outwards for illuminating the obstacles to even the sides of your vehicle.
As such, the given place becomes a great choice for nighttime off-roaders who tend to travel frequently.
The given location offers a completely new version of improving the overall visibility because of the versatility offered in terms of light size and angle. As such, the lights can be easily customized to the specific requirements of the users.
A-Pillar
If you are going for high-speed off-roading during nighttime, you can place the lights on the A-pillar of the vehicle for maximum area of visibility.
It is one of the most difficult places to install the lighting system. The only downside of this type of light installation is that it could increase the overall height of your Jeep or vehicle.
Installation of Off-Road Lights
Now that we all know the types of off-road lights available in the market, next comes the second most important thing. And that is the place of installation.
Although they have a holistic idea about using off-road lights, most people find them difficult to install. Sometimes, it is also seen that some laws forbid the use of off-road lights in certain places in the vehicle.
Therefore, before you move to install the lights, always remember to check with the local road authority and make sure that you are abiding by the laws. Nevertheless, when it comes to lights and their installation process, the driving lights come in a kit.
The first is that which comes with fitting hardware, and the second comes with a wiring loom. However, if you are new to the installation of driving lights, it is highly recommended to settle for the second option.
Even if your wiring light doesn’t come with a loom, then you can buy it separately. Also, other things to consider like a relay, dashboard switch, t piece connector, and fuse to reach your car battery.
Steps by Step Guide
- The first and foremost step is to find a suitable place for your switch. The switches will help activate the driving lights. Moreover, if your vehicle is blessed with a pop-up compartment, then mounting the lights will be effortless. But make sure to drill holes before mounting the auxiliary lights. You need this cordless driver to make the drilling process easier.
- The engine bay is perfect for mounting the relay or the battery. However, one thing to keep in mind is to avoid the excessive area of engine hot spots; otherwise, the lights will become heated fast.
- Earthing of the lights is also very important. To do this properly, it is important to run the ground wire to the earthing point.
- Another wire shall be placed on one terminal on the switch of the dashboard to the firewall on your vehicle’s headlamp. You can use the t-piece connector to join this wire.
- Then comes the time to run the colored wire out of the relay through the firewall on another terminal and the dashboard switch. Another wire shall connect the driving lights, and every wire shall have an earthing point.
- Finally, comes the time for testing. After everything is mounted properly, then test the driving lights and check to see if they are working on a high beam and the dashboard switch’s operation.
- Check for the light beams at night and keep a spanner with you for adjusting the bolts.
Off-road lights, if installed at home, will save you a lot of money. Thus, next time before taking the help of a professional, check out the above points and mount them easily.
What Are The Different Things To Consider?
If you have already made up your mind about investing in an off-road light, then there are a few factors which you have to take into consideration. We have decoded the below aspects for your convenience, which will easily set you on the right track.
Cost
Whenever we talk about investment, the first thing that comes to our mind is cost. Cost indeed plays a huge role in determining every aspect of buying, and the same can be said for off-road lights. These come in various shapes and prices.
Off-road lights are mostly constructed in a single bar or a set of 2 pods. Depending on the beam, watt, and combo options like floodlighting or spotlighting, prices may vary.
Features
Features play an important role when it comes to buying off-road lights. For example, if you live in extreme weather conditions, then an LED light equipped with floodlighting will do the trick.
Similarly, for roads that have a rugged condition spot-lighting, off-road lights will be helpful for you. Other than these features, there are some important things to look out for:
- Type of Bulb: Depending on your place and requirement, you can go for HID, Halogen, or LED lights.
- Power: The more the power, the more of the light will be dissipated.
- Heat Emission: There are off-road lights that come with a cooling fan for longer performances.
- Mounting Brackets: Certain manufacturers provide mounting brackets for easy installation of the lights.
- Warranty and Service Life: Always settle for off-road lights that come with a warranty period ranging up to 2 years. A good quality off-road light can provide service up to 20,000 to 30,000 hours when it comes to service life.
Design of the Lights
Design and construction both play a key role when choosing off-road lights. These lights consume less power and are a brighter option compared to other types of lighting.
Off-road lights are also shockproof or waterproof, which adds value to the function. Also, they come in both flood and spotlight options.
All these together pave the way for one common point, and that is for night driving; checking all the above parameters will always help you make a decent buy.
Ease of Use and Performance
This is the last and one of the most important points when buying. We all want to invest our money in things that will be easy to operate.
By following this small rule, we as end users have the additional option of settling for higher quality things than others. Off-road lights are no different.
Most of the time, people forget to look at other aesthetic features such as color and temperature.
Therefore, whenever you are up for buying any off-road light, always check for cool-looking lights that are easy to mount and do not obstruct the radiator’s airflow.
Conclusion
Off-road driving is one of the most thrilling experiences of life. However, this riveting experience can go haywire when you lack the essential features for your vehicle.
Therefore, next time you will buy an off-road light, take a look at the above points and make a smarter choice for a safer ride. As they say, it is always better to be safe than to be sorry!
![Read more about the article What Size Winch for Jeep [A Detailed Guide]](https://autopartsguideline.com/wp-content/uploads/2021/10/what-size-winch-for-Jeep-300x209.webp)